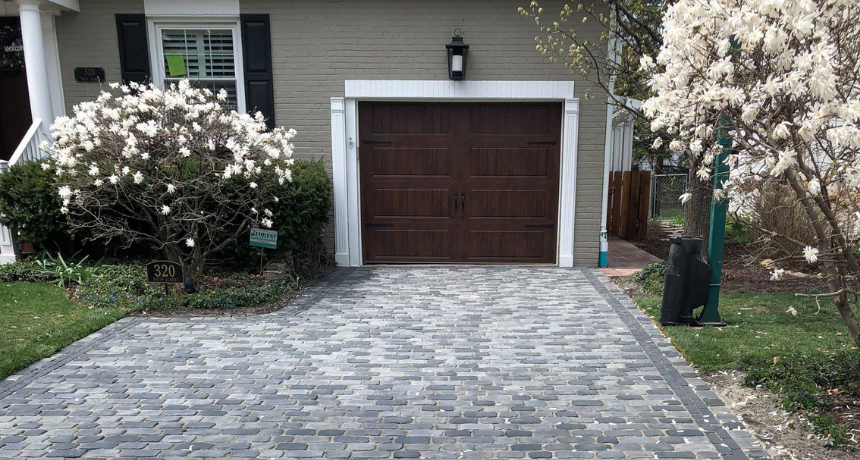
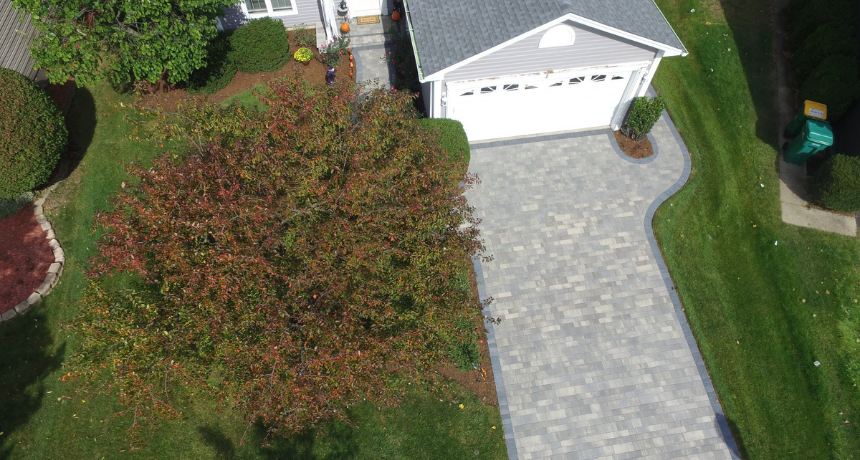
Choosing the ideal style for your driveway is an important decision, with the potential to create a lasting impression on visitors and maintain the safety of your vehicles. Are you in search of a driveway that seamlessly combines efficiency with low maintenance, all while adding that extra wow factor? If so, a brick paver driveway is a style you should undoubtedly consider. It’s not just about aesthetics; a brick paver driveway embodies a plethora of qualities that make it an excellent choice for any homeowner seeking both beauty and functionality. In this blog, we’ll not only explore why brick paver driveways are exceptional but also provide you with a step-by-step guide on how to execute a successful paver driveway installation.

Top Reasons Why a Brick Paver Driveway is Suitable
A brick paver driveway offers several advantages over other types of driveways, such as:
1. Longevity:
When considering a driveway, longevity is a foremost factor. Brick pavers are renowned for their enduring nature. With the ability to withstand heavy loads and resist wear and tear over the years, a brick paver driveway ensures a lasting investment for homeowners. The robustness of the pavers translates to fewer replacements and repairs, ultimately saving both time and money.
2. Low Maintenance:
Brick paver driveways require minimal maintenance. Its routine maintenance involves straightforward tasks like sweeping to keep the surface clean and occasional washing to maintain its appearance. If an individual paver incurs damage, it can be easily replaced without disturbing the entire driveway. This simplicity in upkeep makes brick pavers an attractive choice for homeowners seeking a hassle-free driveway solution.
3. Diverse Material Selection:
Brick pavers are available in two main materials: clay and concrete. Clay pavers offer a timeless and natural aesthetic, infusing warmth, and character into the driveway. On the other hand, concrete pavers provide a wider spectrum of choices regarding colors, shapes, and sizes. Homeowners can select the material that aligns with their preferences and architectural style, making brick pavers a versatile choice to suit diverse aesthetic and functional needs.
4. Environmentally Friendly
Choosing a brick paver driveway is a green choice. The bricks are made from natural materials like clay or concrete, making them eco-friendly. These pavers allow rainwater to soak into the ground, reducing runoff and protecting local water sources. By picking a brick paver driveway, you’re making a responsible choice that benefits both your home and the environment.
5. Quick Installation
When it comes to getting your brick paver driveway in place, it’s a speedy process in comparison to alternatives. After preparing the ground, laying the brick pavers is efficient and straightforward. The pavers interlock seamlessly, speeding up the overall installation. This quick setup is a major plus, meaning you can have your new driveway without disrupting your daily routine for a long time.

Paver Driveway Installation: Step by Step Process:
1. Choose the Material:
The very first step in crafting a sturdy and appealing paver driveway is picking the right material. For paver installation, you’ve got options like concrete pavers, clay bricks, and natural stone pavers, each with its own unique qualities and costs. Consider how you want your driveway to look – whether it’s the versatility of concrete, the warm touch of clay, or the natural beauty of stone. Also, think about how much effort you want to put into maintenance and what fits your budget. Once you’ve made this foundational choice, you’re all set to dive into the next steps of installation.
2. Prepare the Design:
The second step in installing your paver driveway involves crafting a design that resonates with your vision. Start by drawing a basic layout and plan out the shape and pattern you like. Common patterns include herringbone or basket weave, which can add a nice touch. Choose colors that match your home’s exterior or surroundings, and you can mix them to create an interesting look. Figure out how many pavers you’ll need based on your driveway’s size and the pattern you’ve chosen. Don’t forget to plan the edges, as they give a neat look. Also, think about lighting and where you could plant some greenery. If you’re unsure about the design, consulting a professional can be helpful.
3. Prepare the Area:
Once the design is ready, get the area ready for action. To start, clear the area by removing any plants, debris, or obstructions. Next, mark the driveway’s boundary using stakes and strings, providing a clear guide and layout. Dig out the marked area to the desired depth using shovels or excavation equipment. Once excavated, level the ground thoroughly and add a layer of crushed gravel or aggregate, maintaining an even spread. Then, compact this base layer firmly to establish a stable foundation. Make sure that the base has a slight slope for proper water drainage. Lastly, install edge restraints along the perimeter to secure the pavers in place and maintain the driveway’s intended shape.
4. Install the layers:
Now onto the fourth step of installing your brick paver driveway. Start at a chosen point, often a corner or the driveway entrance, and make sure the layout is consistent and well-aligned. Follow your desired pattern, such as herringbone or basket weave, placing the pavers closely together for a smooth and even surface. Gently position each paver using a rubber mallet, making sure they rest securely on the sand bed. Use a level to verify alignment and adjusting as necessary for a smooth finish. Pay attention to maintaining uniformity. You can use a string as a guide to maintain straight lines and accurate alignment. Also, take a step back periodically to review and make any adjustments to keep the design true to plan. Continue this process until the entire designated area is covered.
5. Fill Holes or Gaps:
After securing the pavers in their positions, the next step involves addressing any gaps or holes that might have emerged between them. Thoroughly examine the surface to identify any openings, and promptly fill them with additional sand or gravel.
6. Add Joint Filler:
To strengthen your brick paver driveway, incorporating a joint filler is a must. Typically, this filler is either sand or a specialized jointing compound. Spread it carefully across the whole paved area, making sure it slips into the joints and effectively holds the pavers in place. Apart from its structural advantages, the joint filler significantly lifts the driveway’s look, giving it a unified and refined finish. Be cautious as you apply it.
7. Tidy Up and Clean:
After addressing any gaps and ensuring a level surface, it’s time to tidy up. Grab a sturdy brush and sweep away any excess sand or debris on the paver surface. This not only cleans the driveway but also sets the stage for the final step.
8. Seal the Pavers:
To safeguard your hard work and enhance the pavers’ appearance, sealing is the final essential step. Choose an appropriate paver sealer and apply it evenly across the entire surface. This is important because it helps protect against stains, enhances color, and prolongs the life of your beautiful paver driveway. Once done, step back and admire your completed project – a stunning and functional paver driveway.
If you’re looking to transform your driveway into a stunning yet practical feature for your home, a brick paver driveway is an excellent choice. This step-by-step guide will make your installation easier than you might have thought.

For expert assistance and quality paver driveway installations in Des Plaines, IL, and the surrounding north and northwest Chicago suburbs, reach out to Pavestone Brick Paving. Let us help you bring your vision to life and create a driveway that adds elegance and value to your home. You can call us at 847-895-7004 for more information.


